Installing electronic components or firmware chips on How to Install 35-DS3CHIPDUS3 35-DS3CHIPDUS3 requires precision, preparation, and the right tools. Whether you’re upgrading a device, performing a repair, or integrating this chip into a custom circuit, understanding how to install it correctly is crucial for ensuring performance and safety.
This guide offers a step-by-step installation process for the 35-DS3CHIPDUS3, including pre-installation requirements, hardware setup, configuration tips, and troubleshooting steps.
What is 35-DS3CHIPDUS3?
Before we dive into the installation process, let’s briefly understand what 35-DS3CHIPDUS3 is.
The 35-DS3CHIPDUS3 is a digital system chip, likely used in embedded systems, automation modules, or motherboard circuitry. It can be a proprietary chip for data processing, device synchronization, or real-time signal management. Because the exact nature of this chip depends on the manufacturer and usage context, always refer to the official datasheet or user manual for specific features.
Common applications include:
- Industrial control boards
- Consumer electronics (smart TVs, routers)
- Automotive diagnostic tools
- Robotics and IOT devices
Pre-Installation Checklist
Before handling the 35-DS3CHIPDUS3, ensure the following:
1. Tools Required:
- Anti-static wrist strap
- Screwdriver set (precision type)
- Soldering iron and solder (if chip is through-hole or SMD)
- Multimeter (for continuity and power check)
- Clean cloth and isopropyl alcohol
- Chip extractor or pliers (if replacing an existing chip)
2. Software/Drivers:
- Device-specific drivers (provided by the manufacturer)
- A compatible firmware updater or flashing tool (if needed)
- Data backup software (for firmware replacement cases)
3. Safety Equipment:
- Safety goggles (recommended)
- Static-free mat
- Proper ventilation (for soldering)
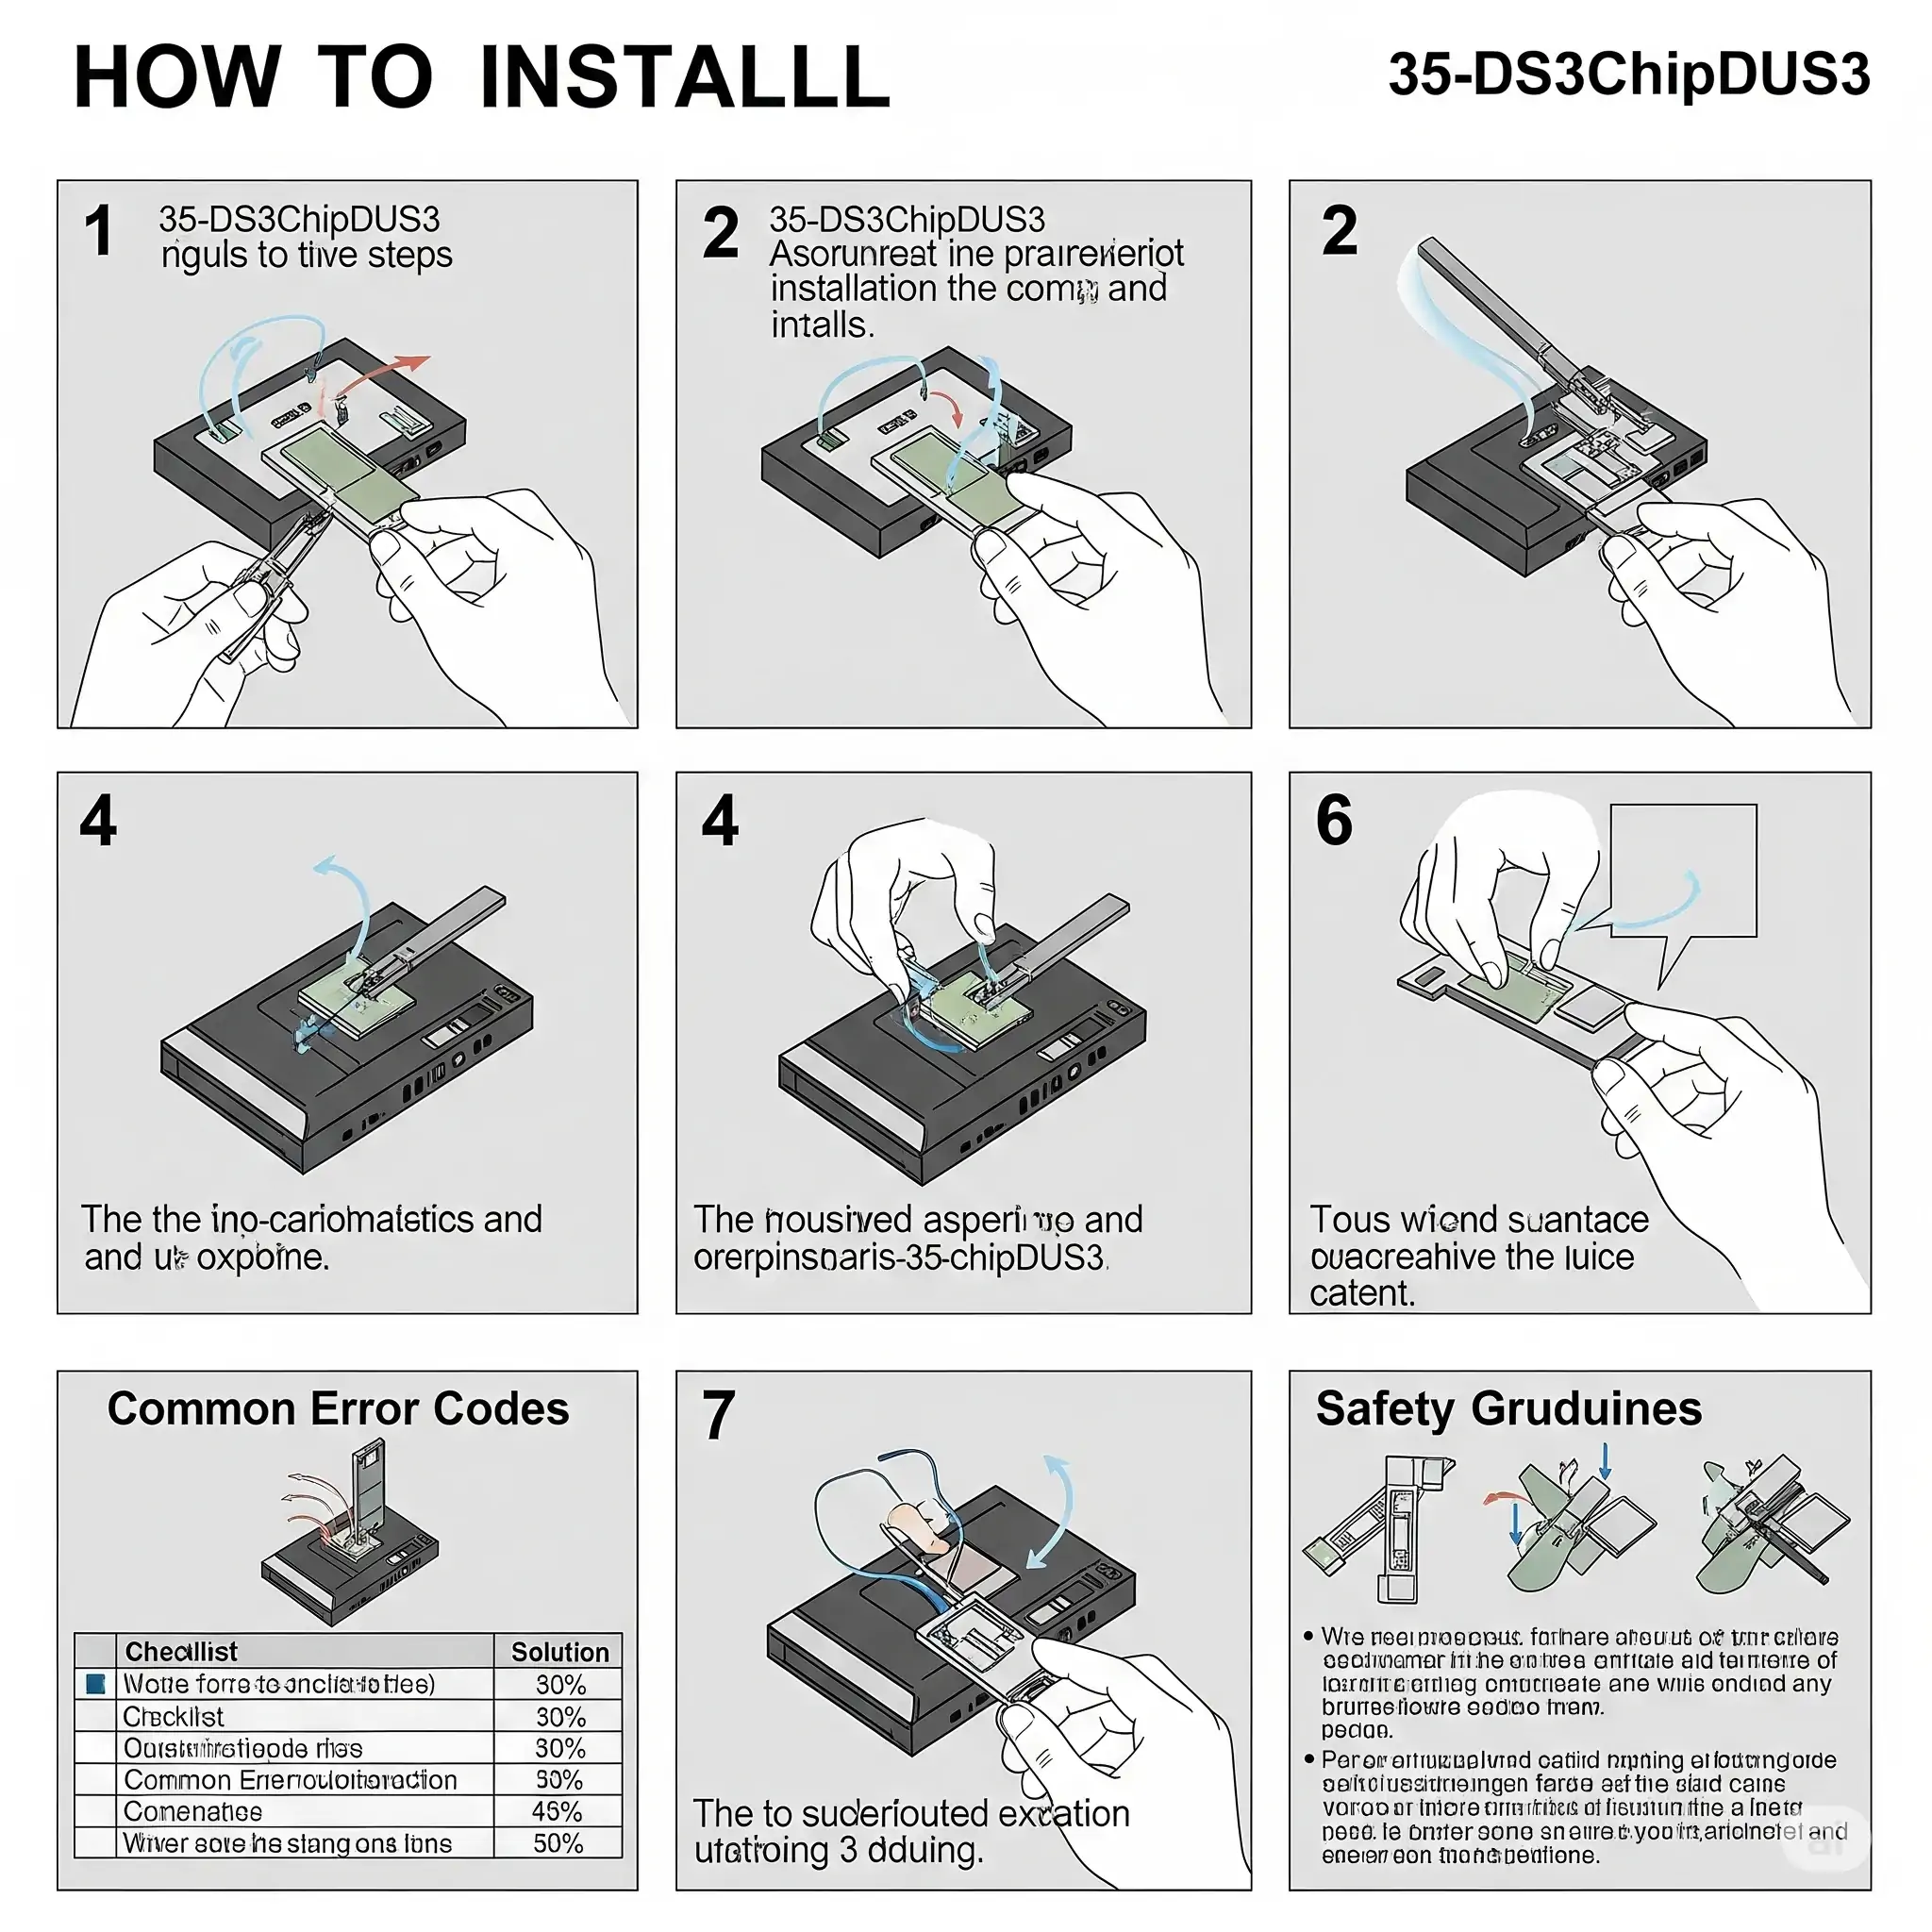
How to Install 35-DS3CHIPDUS3 Steps?
Step 1: Power Down and Unplug the Device
Always start by disconnecting the power supply from your device. This minimizes the risk of electric shock and prevents damage to sensitive components.
Note: If working on a laptop, remove the battery before opening the casing.
Step 2: Disassemble the Device
Use the appropriate screwdriver to carefully open the device’s casing. Keep track of each screw using a magnetic tray or labeling system.
Locate the chip socket or the PCB (Printed Circuit Board) where the 35-DS3CHIPDUS3 will be installed. Use your flashlight if necessary to examine the board for orientation markings.
Step 3: Identify the Chip Slot or Solder Pads
There are generally two types of chip mountings:
- Socketed Chip – Where the chip is inserted into a ZIF (Zero Insertion Force) or DIP socket.
- SMD (Surface-Mounted Device) – Where the chip is soldered directly onto the board.
Important: Always check the pin layout and orientation notch before proceeding. Installing the chip backward can damage both the chip and the board.
Step 4: Remove the Old Chip (If Applicable)
If replacing an older chip:
- Use a chip extractor to remove a socketed chip gently.
- For soldered chips, use a soldering iron and desoldering pump to remove the connections cleanly.
Clean the contact points using isopropyl alcohol and a lint-free cloth.
Step 5: Insert or Solder the New 35-DS3CHIPDUS3
Depending on your chip type:
➤ For Socketed Installation:
- Align the chip’s notch with the notch on the socket.
- Gently press the chip into the socket until all pins are firmly in contact.
➤ For Soldered Installation:
- Carefully align the chip with the board’s layout.
- Solder each pin using minimal solder to avoid bridging.
- Use a magnifying lens to inspect the joints.
Tip: Apply flux before soldering to ensure better adhesion and conductivity.
Step 6: Double Check Connections
After installation, check:
- No pins are bent or misaligned
- No short circuits between soldered joints
- The chip is seated evenly and firmly
Use a multimeter to verify proper connection and no unintended shorts.
Step 7: Reassemble the Device
Once satisfied with the chip placement:
- Reattach the casing carefully
- Ensure no cables or connectors are misplaced
- Tighten all screws and secure panels
Step 8: Power On and Test
Plug in the device and turn it on. Monitor the boot process.
- If the device boots normally and all functions work, the installation is successful.
- If it doesn’t turn on, recheck the chip orientation and soldering points.
Pro Tip: Use device diagnostic software (if available) to verify that the 35-DS3CHIPDUS3 is detected and functional.
Firmware Configuration (If Applicable)
Some versions of 35-DS3CHIPDUS3 may require firmware installation or driver configuration:
- Connect your device to a PC using USB or serial port.
- Launch the manufacturer’s firmware update tool.
- Load the configuration file or firmware.
- Follow on-screen instructions to flash the chip.
Always use official software and latest firmware versions from the manufacturer’s website.
Troubleshooting Common Issues
| Problem | Possible Cause | Solution |
| Device not turning on | Chip not seated correctly | Reopen the device and reposition the chip |
| Overheating | Improper soldering or short circuit | Inspect solder joints and remove bridges |
| Chip not recognized | Missing drivers | Install or update device drivers |
| Boot loop | Incompatible firmware | Flash correct firmware version |
| Partial functionality | Loose connection | Verify all pins are making contact |
Safety Tips
- Avoid touching chip pins directly with your fingers—use tweezers.
- Discharge static electricity before handling components.
- Never power the device while open, especially during soldering.
- Don’t rush. Taking time ensures fewer mistakes and longer chip lifespan.
How to Install 35-DS3CHIPDUS3 Final Thoughts
How to Install 35-DS3CHIPDUS3 may seem technical at first, but with the right preparation and a careful approach, you can do it successfully. Whether you’re building a new system or upgrading existing hardware, this chip plays a significant role in improving performance, reliability, or adding new features.
By following this guide, you not only reduce the chances of failure but also enhance your technical know-how. Remember to always refer to your device’s documentation and the chip’s datasheet for any model-specific considerations.
How to Install 35-DS3CHIPDUS3 FAQs
Q1: Is it necessary to solder the 35-DS3CHIPDUS3?
Answer: Not always. If the device has a socket, no soldering is needed. If it’s surface-mounted, soldering is required.
Q2: Can I install the chip without technical experience?
Answer: Basic installation can be done by beginners with proper guidance, but soldering should be done with care or by a professional.
Q3: What happens if the chip is installed incorrectly?
Answer: It may damage both the chip and the board. Always follow pin orientation and installation guidelines.
Q4: Do I need internet to install drivers?
Answer: Yes, if the drivers are not pre-loaded. Internet access is required to download them from the official site.
Q5: How do I know if the chip is working after installation?
Answer: Successful booting, detection in the device manager (if applicable), and normal function indicate proper installation.


